http://www.dcgpac.com/


Wednesday, 31 December 2014

How to Tape Cardboard Boxes Correctly

Tape Cardboard Boxes

Did you ever wonder if there was a correct way of taping those cardboard boxes? Simply filling your stuff, closing the lip and putting that long piece of duct tape will never help you to secure the contents properly. Yes, there is a “correct way” of sealing the boxes.

Start with the Right Materials

Even if you manage to tape the materials properly, it won’t do you much good unless you have the right set of materials with you. Start with a sturdy and strong cardboard box. Make sure there are no visible damages or loose edges as this could affect the strength of the box. 

Taping the Bottom

The bottom section is the one that takes the maximum load, so this is the area that you need to start working on first. Close the flaps (if they are open) and bring them all together. Use a nice and thick tape to completely seal the centre portion such that the two big flaps are held together properly. 

The next step is to make a cross with the tape. You might have heard this suggestion a lot of times. But this does work. Make sure you seal off the bottom end of the box before you make the cross. This helps to keep the base even more stable.

The final step in this stage is to make two parallel tape lines on top of the original taped line but in the other direction. This will help to keep the base and the structure pretty strong. 

Securing the Top

The trick to getting a properly packed and tight surface is to fill the contents properly without leaving gap or any space. Just place everything tightly and place it carefully. This way, nothing would move or shift while the box is transported. Once you close the flaps, push it slightly to ensure that it gets a nice and tight seal. 

Like we did in the bottom section, you need to tape off the center section with a thick tape. Now that the section has been taped, add two parallel tape lines on top of the center line but make sure you make these in the other direction. This should give it a nice and tight seal.

Some Friendly Advice

Use a tape dispenser to save time. Don’t rely on yourself for holding the box, measuring the length of the tape, handling the sticky portion of the tape, and applying the tape. This can be done individually. However, it would require a lot of effort and multitasking abilities to pull it off. So make sure you use a dispenser. 

You can use tapes that have text written on this. This is really helpful while marking the boxes. If you use these tapes, then place one on the side, and one can be placed on the top. This would give the necessary information to the handler. 

Tuesday, 30 December 2014

Corporate Gift Packaging Ideas for the New Year

Corporate Gift Packaging Ideas

Corporate gifts are provided by organizations to their employees and usually have a theme that is evident on all the gifts. But that does not mean it has to be bland and boring. You can always spice it up with unique gift packaging that would simply steal their hearts away. Usually the gifts come with the logo of the company but this is not a mandatory requirement. It is all about making the employees feel special. 

However, people still consider corporate gifts to be pen sets, clocks, watches, etc. This was much desired in yesteryears. But today, organizations have moved towards a trend of giving unique gifts. Even if you have not planned any such thing, you can at least make the packaging interesting enough for your employees. If you are at a wall with corporate gift packaging ideas, here are some fresh directions that could help you move ahead. 

Goodie Basket


There is something special about gift hampers that really makes the day for anyone who receives it. This is a good way to package your corporate gifts as the design makes the contents appear more than the actual number. 

Goodie Basket


The Envelope


Mail anyone? People in the corporate sector are used to receiving posts (even in this age of digital communication). How about titillating their experience with the postal envelope by wrapping their gifts in one. It would bring a smile on their faces for sure. 

The Envelope


Looking Formal Indeed


Corporate is all about being presentable at all times. Then why should you exclude gifts from this rule. This new year, try wrapping your corporate gifts in a simple cover and add an accessory like a tie, ID card or anything else that clicks in your mind. Trust me, this will be more memorable than the contents of the gift. 

Looking Formal Indeed

Tin Can Packaging


This is as simple and rustic as it gets. Just put the contents in the can and wrap it in embroidered fabrics or even colourful wrapping paper. It looks so adorable that anyone would want to get this as a gift. The best part about this package is that the tin itself can be used later as a pen stand, chocolate container or just about anything that the person wants. 

Tin Can Packaging

Bouquet of Gifts

Now this is a bit elaborate but will definitely leave a lasting impression on the receiver. Just think about it. A gift package that is topped by this beautiful arrangement comprising flowers and chocolates. Ladies watch out! This could make you fall in love again.

Bouquet of Gifts


Monday, 29 December 2014

How to Tie the Perfect Bow on Your Gift Package!

Gift Package


(Pic Courtesy: Lia Griffith [link to https://www.youtube.com/watch?v=2qSvnCux5QM])

I know that you made several attempts at making that perfect bow while wrapping your gift. It isn’t as daunting as it appears. In fact, it can be as easy as tying your shoelace. Remember, the first time someone taught you to tie your shoelace. Well, this is pretty much the same thing. You only need to take care about the length of each loop of the bow. It should be equal as that is what defines a “perfect bow”.

Tie a Simple Knot

Tie a Simple Knot

Start by taking your ribbon and trying a simple knot. This should not be difficult. Just make sure you place the ribbon around the middle to get a good position for the bow. 

Hold the Knot in Place with Your Finger

Hold the Knot in Place with Your Finger


Now that you have made the knot, keep your finger on it so that the knot doesn’t get loose. This is important for the next step which involves making the loops for the bow. 

The First Loop

The First Loop


This is the most important step in the entire process. The first loop needs to be made with utmost care and remember, you only need to create the first loop now. Once you have made the loop, take the other end under the loop. 

The Second Loop

The Second Loop


Now that you have the free end of the ribbon under the first loop, push it through the knot and let it come out the other end. This is your second loop. You really need to be careful while doing this as even a small mistake could require the whole knot to be undone and then made again. 

Adjust the Bow

Adjust the Bow


When you have two loops of equal length, then adjust the bow to make sure everything is in place. Give the loops a slight tug to ensure appropriate tightness in the knot. 

Cut the Ends
Cut the Ends


Those long ends are not giving a nice visual appeal to the overall presentation. So you need to snip them away. The best way to do it is to fold the ribbon and make a diagonal cut just a few centimeters away from the knot. Do this for the other end also. 

Your Perfect Bow is Ready!

Your Perfect Bow is Ready!

Just straighten out the ends, give a slight tug to the loops and the “perfect bow” has just been made. It wasn’t that difficult, was it? If this is your first time, then be patient and don’t worry. So what if it didn’t turn out like this on your first attempt, you only need a few more to get the hang of it. 

So go on and make impressive bows that are nothing short of being perfect. I am sure your friends will be pretty amazed at your craftsmanship. This is just the basic bow. With time, you would be able to come up with complex bow designs that involve much more than just a few knots and loops. 

To order your gift packaging materials, visit DCGPAC Now !!


Thursday, 25 December 2014

3 Minute Gift Wrapping Ideas for the Busy Soul

Gift Wrapping Ideas

It’s not that you forgot about wrapping up the gifts. You just don’t have the time for it because you are a busy person. It is also possible that you did indeed forget about the gifts and now you are running out of time. If you mess up the wrapping, then you would fail to make an impression on the people receiving the gifts. Creating a presentable wrapping would take some time, which you are clearly running out of. What’s the best thing that can be done?

Here are some amazing gift wrapping ideas that should not take more than 3 minutes to do and they don’t compromise on visual appeal in any way. 

Bon Bon Style Wrap

Bon Bon Style Wrap


It just doesnt get any simpler than this. Even if you have less than 2 minutes to make this wrap, you would be able to do it easily. Just keep your gift item on a sheet of paper, fold around completely, pinch the ends and hold in place with a tape, and tie ribbons. It should not take more than 3 minutes to create this classic gift wrap design. 

Fabric Pineapple Wrap

Fabric Pineapple Wrap

The trick here is to get a good cloth piece with the right colours. This is the only part that would need your time. Once you have it with you, it’s all a matter of placing the object inside and folding up the ends to form a pinched end. With that done, you need to tie the junction and put a ribbon, flowers, balls, etc. That’s about everything that needs to be done here. My guess is that it took you less than 3 minutes (excluding the cloth searching part). 

Pouches

Pouches


You can find these in your house or office anytime. Even if you do not have them, you can always buy them as they are easily available. This is probably the fastest gift wrapping ideas. It might not exactly be a wrap but at least it makes a good presentation with minimal effort. Just keep the contents inside and tie the end with a simple string. The star of the show is the tag or the label. This is what gains the most attention in this package so make sure you write a nice message or the name of the recipient. 

Simple Box n Ribbon Wrapping

Simple Box n Ribbon Wrapping


This is a simple gift wrap. There isn’t anything bold about this design. But it is appealing and has a rustic simplicity in it. This can take slightly more than 3 minutes to make but it would be definitely worth the while. Just use a wrapping paper and make sure you use a corrugated box. The box will give you fixed dimensions and it would be easier to work with it. A simple wrapping should not take much time. Now for the fancy flower on the ribbon part, you need to tie the ribbon in a cross like you tie any string. Get a readymade flower or fancy ribbon design and simply stick it on the joint. Voila - you have a neat gift in just over 3 minutes. 

Wrapped in Cloth

Wrapped in Cloth


If you think that wrapping your gift in a piece of cloth is weird, then check out the traditional gifting style of the Japanese. They have been wrapping their gifts in clothes since ages and it does make a simple yet rustic gift wrapping design. This would take under a minute for the actual wrapping and around 2 minutes for finding the right piece of cloth. Once you have the right piece of cloth (with a pleasing design of course), you simply need to put the item in it and tie it just like you would a bundle. 

Tuesday, 23 December 2014

4 Creative Gift Wrapping Ideas for Christmas

Gift Wrapping Ideas

Have you thought about your own creative packaging for Christmas this year? I know you must be struggling quite a lot with the ideas. It is not that tough if you think about it. Just let your emotions guide you and I am sure that you would be able to come up with your very own unique and creative. Considering that Christmas is due in 2 days and the New Year is just a week away, here are some ideas just to help you get started. 

Christmas Tree Packaging

Christmas Tree Packaging


Yes, this is a centerpiece. But if you take a good look at it, this is an interesting packaging design. This would work well when you intend to give a lot of gifts or you simply want to place the gifts collectively in one place for the kids. The “Christmas tree” like design and the careful placement of the gifts in decreasing order (by size). Now isn’t this a cool way to make the occasion even more special? 

Brown Bag Doodle Wrapping Paper

Brown Bag Doodle Wrapping Paper


Now this is an interesting idea. Brown paper and doodling. This is probably one of the simplest and most rustic packaging ideas ever. The best thing about doodling is that you are not expected to be perfect. You can make not-so-straight lines and curves that are slightly off. This is because at the end of the day, it is the emotions that matter. This is also a time saver as you only need to wrap in brown paper and then make the doodles with a marker. That is pretty much everything that needs to be done. 

Tapeless Wrappers

Tapeless Wrappers


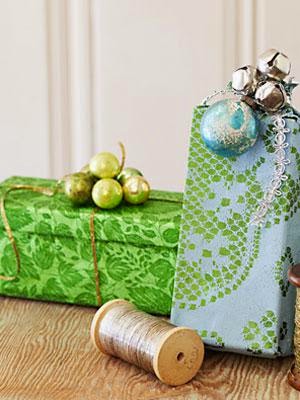
Have you ever thought about using embossed plant foil instead of conventional packaging materials? This particular foil is used for covering plant containers and is similar to aluminium foils in terms of texture. So, it is obvious that you would not need any tape to seal the ends. You only need to roll or fold the edges and give it a little pinch. That would take care of the sealing part. For decoration, you can always add balls and mismatched bells at the top section. 

Wrapped in Cloth

Wrapped in Cloth


This may not be the regular gift wrapping idea as not many are open to the notion of using cloth as a packaging material. But this is indeed a rustic packaging material and reflects the way in which things used to be packed in the old times. Use any piece of cloth and simply tie the ends after placing the gift in the fabric. 

The idea in the image is just for reference. It is obvious that you need to select the print and design in keeping with the occasion. But this is definitely a great idea which not only saves time but is pretty easy to manage without using a lot of stuff. 


Saturday, 20 December 2014

5 Amazing Christmas Wine Packaging Ideas

Wine Packaging Boxes

There exists a special bond between Christmas and wine. Gifting wine has become more of a tradition during the holidays. Some use it to kick start a party, while others use it exclusively to wash down the rich food that is prepared during this festive period. Either way, wine does form an important component of the celebrations. 

The wine manufacturers already come up with beautiful designs for the packaging of their products. But they would all be the same for that particular product. If you want to make an impression with you packaging and “presentation” skills, then you need to put on your thinking cap and come up with creative ways to pack the bottle. Don’t just resort to wine boxes as it would be a bit bland, unless you plan on decorating the box and coming out with something new.

Here are some wine packaging ideas that should help you get started if you have not yet come up with an idea of your own. In case you have already thought about a design, then these ideas should give you more directions to consider. 

Santa’s Helpers!

Wine Packaging
This may be a good option for those who simply don’t have enough time for packing the bottles in a grand way. Just use some cotton for the beard, a piece of rubber or rolled up cotton for the nose, and a small coloured hat. It is not too difficult to create. 

This will make anyone’s day as it presents the bottle without much packaging so all you need to do is to “rip off the heads”, open the bottle and start drinking!


Wrapped Up!
Wine Packaging


Now this packaging isn’t very complex to pull off (as you can see in the image). Take any wine bottle, wrap it in covering paper and add a piece of rough cloth (use clean ones, obviously) to make a simple yet appealing presentation. By adding the name of the recipient or a personal message in the tag, you can personalize the gift even more. 

Candy Wrapper Packaging

Wine Packaging
Nothing beats the classic “candy wrapper” packaging. Just take any covering or wrapping material (cloth, paper, film), put the bottle in the centre and start converging it at the top. When you hold the ends of the wrapper together, it will appear like a candy packaging. At this point, tie up the end with a ribbon and viola – you have your very own sensational wine gift which would definitely bring back some memories. 


Corporate Gifting!

Wine PackagingSo you are the corporate guy / gal and you want to make an impression on your boss. Then get yourself an arm from an old shirt, find a tie (or buy one if you can), choose a good wine and then wrap the bottle in the arm by completely sealing the bottom. Then put the tie around the bottle’s neck and make sure the presentation looks good. Just think of it as a representation of yourself. Now ain’t that bottle looking every bit like the corporate entity that its meant to be?

Snug in Socks!

Wine Packaging
Yeah right! Socks. You read that correctly. It is possible to wrap up the bottles in old socks and tie up the end with a ribbon. Now before you get all jittery about the thought of using an old sock, remember, the socks would definitely be clean and ensured to be rid of any smell (unless you really hate the recipient and want to spoil his holiday celebrations). Jokes apart, this is a good way to present the bottle as it would not only look good but it would be easier to grip the bottle while taking it along with you. 

Thursday, 18 December 2014

How to Manage Packaging During The Holiday Rush Like a Pro

Happy Holidays

It’s that time of the year when the festive spirits are at an all-time high. The holiday season not only bears witness to joyous celebrations, but also heavy holiday rush. After all, everyone wishes to send gifts to their friends, family and loved ones. The holiday rush may not affect you in a major way, but it does have an impact on the performance of businesses, especially those involved in eCommerce as the orders may comprise any number and type of products. 

The thing about the holiday season is that people expect a visually appealing and highly attractive packaging that manages to keep all of the contents safe. This is the challenging part that needs to be approached with care. Usually, businesses come up with their own packaging boxes or packaging solutions so that the spirit of the festive season is not diluted in any manner. However, the problem lies in the fact that customers may order anything and in any number so the business needs to accommodate the demands without compromising on packaging effectiveness. 

Do you want to know how the professionals manage the holiday rush? Just follow these tips and you should be able to do it like them. 

Calculate Your Packaging Requirements

This is one of the most important aspect of the holiday rush. You need to come up with proper estimates of the upcoming demand for your products during the festive season. A good way to approach this would be to use previous year’s data and analyse that in keeping with the rate of business growth. This should give you a good idea about the demand that you could expect this year. 

Keep a Buffer

Just because you need a certain number of packages doesn’t mean that you have to order only that much. It is advisable to maintain a buffer so that any last minute problems related to packaging may be managed without causing any delay in the entire process. Keeping a buffer is also beneficial for surplus demand where the sales go beyond that of previous years. 

Come Up With Custom Designs Especially for the Holiday Season

The most notable issue faced by businesses during the festive season is the difficulty in striking a balance between visual appeal and overall design of the package (from a safety perspective). Cost also plays a major role here as the investment in acquiring packaging material needs to be kept at optimal levels. This is where the need for coming up with custom designs can help businesses as the materials would be prepared according to the specific parameters and this would ensure better compatibility of the packaging with the contents. 

Offer Bundled Packs

This is the safest bet that you (as a business) can take during the holiday season. By offering pre-designed bundled packs, you have less chance of getting orders with products of varying sizes and dimensions. Moreover, all of the products in the bundle would come pre-packed and carefully placed within the package so that everything remains intact with minimal movement. Now that the safety aspect has been taken care of, it becomes even easier to focus on making the package highly attractive by adding decorative elements and carefully placed accessories. 

Inform Your Packaging Material Supplier Beforehand

Make sure that you inform your packaging material supplier about the estimated demand beforehand. This would help you to avoid last minute delays and would ensure that your requirement is fulfilled properly. By informing the supplier beforehand, you also get the opportunity to consider the supplier’s perspectives. This is a valuable insight as the supplier has a better understanding of the dynamics of the holiday rush and he would be able to provide effective tips on managing this hectic season like a pro. 

Wednesday, 19 November 2014

5 Impeccable Reasons for Opting Corrugated Boxes

You may not consider something as simple as corrugated boxes to have a lot of worth, but these are the most sought after packaging materials today. These are versatile enough to be used for storing anything as long as the appropriate storing conditions are created. But have you ever wondered what exactly makes these simple boxes so popular?

Here are 5 impeccable reasons why you should opt corrugated boxes for packing your stuff.
Really Affordable
Corrugated boxes are really affordable because you can get them in bulk quantity and the fact that you can get ones that are recycled, helps to save a few bucks. These boxes are easily available and you can get them whenever you want, even if there is a high demand for them. If handled carefully, these boxes can be reused, thereby helping you to save up on your expenses.
Eco-Friendly All the Way
Surely you can use boxes that are made from virgin fibres, but that would only cost you more and you would be getting packing materials that are made completely from fresh pulp. Corrugated boxes are eco-friendly and can be recycled with the boxes being made from sheets that have varying ratios of virgin to recycled fibres. Despite the varying ratios, the boxes never lose their durability or sturdiness. The only thing that they lose is a portion of their price, which is really a benefit for the customers.
No Weight Issues
Have you ever tried lifting a single corrugated box? Even a child would be able to lift it as the box itself is very light. A major benefit of the light weight of the boxes is that the overall weight (after the contents have been placed in it) does not get affected by a great margin. This is also helpful for keeping the transport costs within a feasible range. Other packing materials, such as wood, tend to add a lot of weight to the entire package. With corrugated boxes, you can be assured of “light-weighted” packaging.
Sturdy to the Core
Just by viewing a corrugated box, you would not be able to find out the reason behind its sturdiness and strength. The flutes in the corrugated material are the source of the strength and durability. Apart from structural rigidity, the design also provides cushioning to the contents. All of these features makes corrugated boxes highly suited for use as shipping boxes, especially when shipping over long distances.
Very Adaptable
Corrugated boxes are highly adaptable to the requirements and can be cut into any shape and size. The best part about these boxes is that they already come in various configurations, so you don’t have to put in a lot of efforts to procure them. Even if you specific requirements are not met, you can always get them prepared. It would be wise to order corrugated boxes with large flutes or multi-layered flutes for storing heavy items. 

Thursday, 13 November 2014

8 Easy Steps to Manage Relocation Like a Pro

Relocation can be a tedious undertaking, especially with the amount of preparation and manual work involved. Have you ever wondered how professionals manage to pull of this seemingly daunting feat? Well, for a start, they don't possess any magical powers. Its all about carefully analysing the items that need to be relocated, their characteristics, and the best packaging materials that would ensure the safety of the contents. 

Check out this infographic for a simple guide to easy relocation without much hassles. And if you are still not able to manage your relocation, then you need to seek out professional relocation services. 


Saturday, 1 November 2014

How to Measure Customized Boxes Correctly To Avoid Ordering the Wrong Box Size

Corrugated boxes, especially Customized Boxes, come in various sizes and orientations. While ordering a box, you need to know exactly what you are ordering and the correct format of sharing the measurements. Without these information, you could end up getting the wrong sizes. The importance of getting a perfect box size is that you get to store the contents in the best manner possible without worrying about left over space or less space.
Measurement Recording Format
All boxes are measured by Length x Width x Depth/Height. So irrespective of how you take the readings, make sure to present them in the above format so that the Packaging Material providers can prepare the required box sizes for you. Now the flaps can cause a little problem when taking measurements, so it is best to keep the flap opened and facing straight up, so that minimal interference is caused by them.
Common Box Types
Since boxes come in various orientations, it is possible for you to get confused when noting the depth / width of a tall box. You need to understand the basic box types and the ways in which they can be measured, to avoid taking wrong measurements. 

The following are some common box types and their measurement methods.

  1.   Square Box


These boxes are comparatively easy to measure and are also one of the most commonly used box types. In the illustration, it is clear that all the flaps are open and facing upwards. The sides that need to be measured for length, breadth and depth are indicated in the illustration.

     2.   Flat Box


Flat boxes are really useful packaging materials as they keep the contents intact with minimal movement during transit. The sides that need to be measured for length, breadth and depth are indicated in the illustration. Make sure that the flaps are carefully kept facing upward because the slightest error in values could cause a problem later. Don’t confuse between the length and the width while measuring. It is best to stick to the illustration because that is the standard way of measuring these boxes.

    3.    Tall Box


Now this is the box which really creates confusion when measuring the depth and length. The tall box should not be confused with the long box and for this to happen, it is important to know which side depicts which measuring factor. The sides that need to be measured for length, breadth and depth are indicated in the illustration. Don’t mistake the depth as the length of this box.
Some Words of Advice
Always use proper measuring instruments and tools for noting readings for your desired box. If you do not have a reference box, then keep all the contents in one place and understand the basic dimensions of the box that would be required for them. But before that, make up your mind as to which box would be required for the contents. You cannot use a square box to store plates that would be transported over long distances. For this, a heavy duty shipping box or a flat box would be the best option. So make sure you get the right box with the right dimensions for the right contents.


Wednesday, 15 October 2014

4 Packaging Tips That Will Ensure Your Gifts Are Delivered On Time This Festive Season

The festivities are just beginning with the holiday season being so near. I am sure that you must have already started preparing the list of gifts that you would be sending out to your near and dear ones. But what if your gifts fail to reach them on time or if they are damaged during transit? You would be disappointed and it would definitely spoil your mood. By taking a few precautions and being careful about your choice of packaging materials, you can ensure that your gifts are delivered on time and without any damages during this festive season.

Select the Correct Packaging Box

Packaging Box
Did you know that a crease (made in the box’s wall) can reduce the strength and durability of the package by 70%? These are alarming figures and you should be careful about the box that you chose. It is better to use a new corrugated box or one that has adequate strength even after being made from recycled materials, because a used box would have less strength.

If you have no other option other than reusing White Shipping Boxes, then you need to make absolutely sure that the box is in excellent condition with proper strength and durability. A good way to check this is to ensure that there are no punctures, tears, rips, or corner damage, and that all flaps are intact. Don’t forget to remove old markings and labels before reusing the box because it could be sent to the wrong places due to old mailing information on it.

Lastly, you need to get the correct size because if it is too large, then you could be wasting your money on some extra space that would not be utilized. For getting the right sized boxes, you need to first sort out your things that you want to pack and then note down the rough measurements for the required box. This should do the trick.

Add Adequate Cushioning

During the festive season, you can expect people to handle the products roughly owing to the sudden increase in the number of packages being shipped and the urgent deadlines that need to be adhered. The best way to prevent any damages from being inflicted to the contents is to add proper cushioning.

The cushioning can be provided by covering the content in bubble wrap, adding paper pads or using loose fill peanuts for filling up the void. If you have delicate items for packing, then cover them individually with packing paper before putting it in the box along with the padding. This should help to keep the contents safe during transit.

Seal the Box Properly

People often make the mistake of not giving due attention to the manner in which the boxes are sealed. Merely getting the right box and adding cushioning would not help you to secure the contents. You need to use strong tapes (preferably packaging tape or nylon reinforced filament tape that are over 2 inches in width) for sealing the box.

The top needs to be secured by applying three individual strips of tape to keep everything intact. The same can be done for the bottom. However, it would be better to tape the bottom in a cross shape as it helps to strengthen the base even more.

Provide Appropriate Labels and Markings

The label should be placed prominently on the surface of the box so that it has proper visibility. Moreover, the information should be clearly presented on it to ensure that it reaches the desired destination. For international shipments, you should definitely include the contact names and telephone numbers of the recipient and the shipper. Remember to use just a single label as multiple labels can be quite confusing.

Markings are also important because they give an indication of the nature of the contents and the way in which the package needs to be handled. Just use markers for putting symbols or text on the Packing Material and your package should be ready for dispatch. 

Wednesday, 8 October 2014

7 Tips for Packing Electronics


Take a look around. What do you see? Electronic items, right? This is what the current age of technological marvels has provided us. We have been blessed with amazing electronic gadgets, equipment and tools that make our lives much easier than before. However, these electronic products also have a high price tag and this generates the need for storing and packing them carefully. You just cannot pack them like any other item because the delicate components and parts need careful attention in order to provide the highest levels of protection.

I am sure that you would not want your precious electronic products to be damaged during transit or storage. So follow these important tips and ensure the safety of your products in a better manner. 

Always Refer to the Provided Manual
I am sure that you too are among those who prefer to throw the instructions manual / guide in your drawer the moment you unpack the electronic product(s). These manuals clearly state the conditions that are needed for storing or packing the products. Moreover, you would be able to identify parts that have high risk of damage and require more attention. In case you lose the manual, you can always check out the manufacturer’s website and download the information from there.

Use the Original Packaging
There is nothing better than using the original packaging in which the product was shipped. This packaging has all the necessary characteristics that are needed for storing the product safely and this includes the correct Packaging material, labelling, size, cushioning and storage conditions.

Seek the Best Alternative Packaging Materials
In case you do not have the original packaging with you, then you need to seek out the best alternative that are available for the product. Apart from the material, you need to procure covering paper / newsprint for wrapping the product, scissors for cutting the paper or adhesive tapes, Bubble wraps and markers for labelling the boxes.

Label the Components
Electronic products usually come with a lot of attachments, accessories and components. These items need to be disassembled before they are packed. The worst part about handling such items is that things can get rather frustrating due to the improper sorting. Moreover, if the cables get tangled, then it could take a long time before you are able to untangle them. The best way to handle the situation is to label each component in such a way that you are able to understand which part goes where.

Identify Specific Storage Requirements
Certain electronic items such as personal computers and televisions need to be stored in climate controlled storage units. So you need to consult with the manufacturer or a qualified technician to understand the exact storage requirements for your device. The packaging and the cushioning should only be decided after the requirements are clear to you. This would help to ensure the safety of the products during transportation / storage.

Store Expensive Equipment in Unmarked Boxes For Safety
Labelling and marking the packages is a good practice, but not necessarily one that could protect the boxes from the evil intensions of thieves. Marked boxes that clearly indicate the worth of the goods stored inside them are primary targets of thieves who are always on the prowl for the perfect opportunity during which they would be able to get away with these valuable items. The best way to deviate attention from these products would be to pack small expensive items in unmarked boxes and ensure that nothing fancy is done with the packaging. This should reduce the applicable risk to some extent.

Ensure a Dust-Free Storage Environment
Dust is the biggest enemy for electronic items as it can damage the delicate components. The best way to minimize the presence of dust inside the devices is to wrap electronics in linen or clean paper and then completely seal off the boxes by taping them. You can also use sheets or moving pads to add another layer of protection for the sensitive components. This should help you to maintain minimal levels of dust inside the packaging.

Tuesday, 30 September 2014

Simple Cheats to Organize and Pack Your Stuff for Convenient Storage

It is easy to make a mess and ignore it. But when it comes to packing our stuff and organizing it in a storage unit, we are made aware of the volume of mess that we have created. With unsorted items lying here and there, the task at hand seems more daunting than it actually is. You need to learn the ways in which all of your stuff may be packed properly and made to fit in the available space without much hassle. 
Proper Packing Makes a Big Difference
What is proper packing? The first thing that you need to understand is that not every item can be packed in a common Packaging Material. A lot depends on the specific nature of the item that is being packed. Fragile items need to be individually wrapped in wrapping paper or bubble wrap to protect them from collisions with other products that are packed along with it. But make sure that these packages are labelled as “FRAGILE” to provide appropriate indication about the nature of the contents.

Boxes are the universally preferred packing material wherein you can store just about anything in it and the box can be secured by taping it properly. Plastic bags should be avoided as much as possible as it causes an increase in humidity levels in the interior and this can cause mildew which may in turn damage the product.

You also need to focus on the weight distribution in the packages as the weight should be spread evenly. Keep a check on the weight of the entire package to see that the weight does not exceed the maximum capacity of the package. In the case of items like books, it would be better to keep them flat and to pack them in smaller boxes as they tend to be pretty heavy. Keeping the size of the package small would be beneficial in moving them around.

Importance of Arranging the Packed Items Systematically
Packing your things is just one aspect. You also need to ensure proper arranging of the packed items before storing them or shipping the products. The first thing that needs to be done is the determination of the frequency of access to the stored products. In the case of packages that are sent to foreign locations with strict or multiple customs clearance, it is important to keep the packaging lose enough to allow them to open it and check the contents without damaging the entire package.
Similarly, when you are planning on storing your stuff, then you need to

  1. Store the largest items against the side walls and this should be worked forward.
  2. Place any large furniture in a vertical position to optimize space utilization. All furniture that are capable of being stacked up should be stacked in a proper manner to ensure better storage of the  items.
  3. Keep fragile items inside wardrobes or on Strong Boxes to prevent them from crashing.
  4. Group the boxes together and place them as per their weight and dimensions. This should help you  to distribute the weight properly without causing one area of the storage unit to get overloaded.

Always Plan Beforehand
Don’t wait till the last minute to pack things and store them because you might not have the right materials or the tools to pack properly. Moreover, you would not be able to decide which products should be placed in which package. This generally happens when you are not aware of the quantity and type of things that need to be packed. So make sure you sort out the items and then make a list of the requirements so that everything may be placed at the right place and in the right quantity.


Wednesday, 24 September 2014

Having Trouble Packing Fragile Items? Here are 7 Tips to Help You Out

Packing Fragile Items
Irrespective of whether you are planning on relocating your residence, or you are shifting your office to a new location, there would always be some fragile items that will give you a tough time during packing. You can never be too careful with these items because if they break, then it takes a lot of effort to repair it. In certain situations, it becomes impossible to repair it and the only possible resolution is to get a new one. So if it is an expensive vase or a delicate frame, then you would be in a lot of trouble.

Don’t let fragile items scare the hell out of you. Here are 7 tips that will help you to ensure their safety and proper packaging.

Always Prepare the Moving Boxes Correctly

This is the most crucial stage in the packing process. It is obvious that you would be going for the regular Moving Boxes or boxes made from corrugated packaging material. You need to focus on the packaging when you are dealing with heavy items or fragile products. The best way to go about doing it is to make sure that the base is secure as this is the area that is bound to collapse if it is not taped off properly. Make sure that you tape the bottom of the box in an “X” pattern. This should give it better strength. Additionally, you may put crumpled paper in the bottom to provide more cushion. 

Upgrade the Moving Boxes If Required

Like mentioned above, with delicate and fragile items you can never be too careful. It would be wise to do away with the old Packaging Materials and boxes. Instead, get high quality boxes that are not only durable but provide adequate protection from external impacts and forces, and this is really beneficial during transportation. This also helps to reduce the risks that the products are subjected to during transit.

Only Use Good Packing Paper

Generally, we make use of old newspapers or other things to provide cushioning to the fragile products. Newspaper is the most commonly used packing paper and it is good. However, if you wrap it around anything, the ink tends to get rubbed on to it. This can be really off putting if you have an expensive or delicate fragile item. It is also rather cumbersome to remove the ink that has rubbed off from the newsprint. The best approach is to use an unprinted paper as it gives the same quality but has the benefit of having no print at all. This may be slightly expensive as compared to newspaper, but if you are on a low budget then you may use both in combination to achieve the desired result.

Fill in the Gaps

The first rule of packing fragile items is that they should not move while being transported. So make sure that you fill in the gaps with adequate padding and other cushioning materials that the things are packed tightly. People usually think of using packing peanuts and this would be a good option if it wasn’t so expensive and if it did not create a mess every time the package was opened. You can use old paper or other simple materials also.

Wrap Each Item With Care

In the case of bowls, glasses or other small delicate items, it would be better if they were to be wrapped individually and then placed together because they tend to rub against each other. For glasses and other items with a hollowed centre, you need to crumple paper into a ball and then stuff it into the gap. This needs to be followed by wrapping the item with paper or other wrapping material. However, in the case of plates, it is better to stack them up and then wrap the entire “tower “of plates. It is much easier to handle it this way.

Listen to the Package

This is the best way to check whether you have packed the things properly. If there is any mistake or faults with the padding, then you would be able to hear a clink or a thud upon shaking the package. So add more cushioning till the time the contents are so intact that they don’t move and you don’t hear anything.

Go With the “Top-Light and Bottom-Heavy” Approach


Irrespective of the type of fragile material or the quantity, you should always place the heavy items at the bottom while leaving the light ones for the top. Even with proper packaging, if you place heavy items on top, then the contents in the bottom are at a risk of being crushed under the weight.